|
|
|
FINDER — use the Finder as the main method of navigation across Tamale. Deposits are classified using ENTITIES to categorize and sort research.
The finder is the module located in the upper-left corner of the Tamale desktop view.
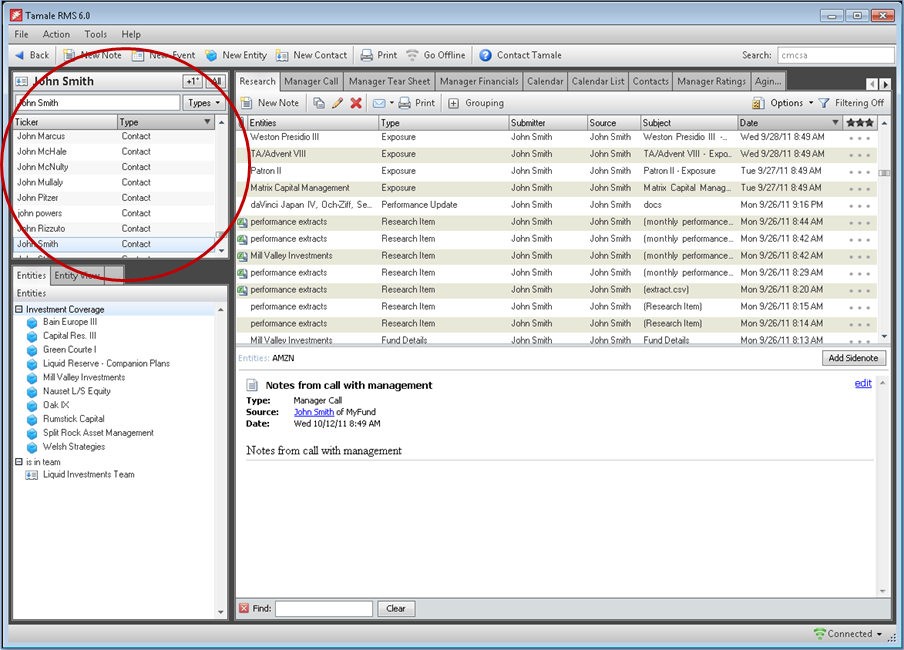
To view a list of research relative to an entity:
- In the Finder, type your ticker or entity name and hit "ENTER/RETURN" on your keyboard, or click the "GO" button.
- As you type, the Finder view (below the text input box) will jump to an area of the Entity list that matches what you'd typed, as you go. Alternatively to entering the complete text, use your mouse to select the correct entity and double-click.
- This will refresh all other modules on the desktop view (Research Tree, Contacts, Research View) to show all research deposited to this entity.
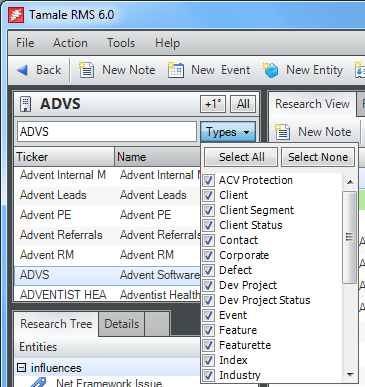
To streamline the list of available entities, you can exclude and include categories ("types") of entities.
- Click on the "Type" button to the right of the text input box.
- Check or uncheck the box next to each Entity type to add (check) or remove (uncheck) that type of entity from the list.
- Note, you may "Select All" (to choose all checkboxes) or "Select None" (to clear all the checkboxes).
In the Finder list, you may right-click any entity to "View" or "Edit" details.

ENTITY — The items listed it the Finder are called "Entities" and can comprise of any type of item that is useful in categorizing research, such as:
- Ticker
- Industry
- Topic
- Contact name
- Corporation
- Deal
- Country
- etc.
To navigate to the research deposited for a particular entity, double-click on the entity name in the Finder. All modules are linked to the Finder and will show all deposited research tagged for that entity in the Research View, the Relationships in the Research Tree, and Contacts.
To create an Entity:

- Click on the "New Entity" button on the main toolbar, or use the keyboard shortcut CTRL + E.
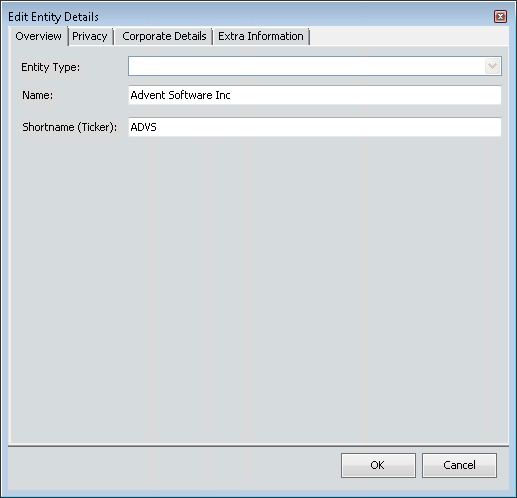
- Select the "Entity type" using the selections available on the pulldown field, then add the shortname or ticker.
ALIAS
An entity can also have an ALIAS — i.e. another name by which you can access or search for this entity and its listings. For instance, a ticker can have it's long-name as an alias, or a corporation's full name can have an acronym (either official or in-house term), or even a particular person's name, to make it easier to associate, identify, and find the research in a way that is easy for you to recall. There can be multiple alias for an entity, and one alias can be assigned to more than one entity, as well.
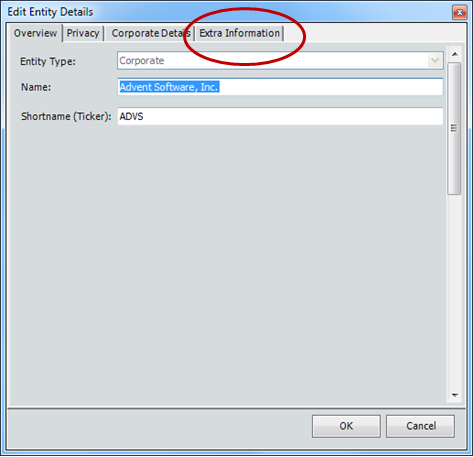
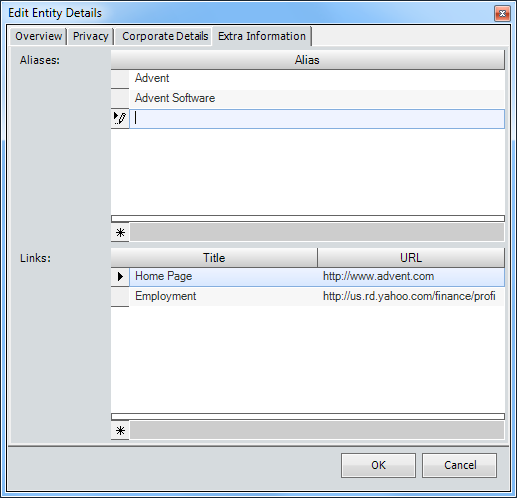
An alias can be assigned to an already existing entity, by accessing the "Extra Information" tab of the entity's "Details."
ADD ALIAS:
In the stock ticker "ADVS" entry, you can assign your contact's name with that ticker:
- Navigate to "ADVS" in the Finder, and right-click the name, then select "Edit Details" in the menu.
- Click on the "Extra Information" tab in the dialog, and in the upper half of this screen, type in the "alias" in the text field next to the asterisk ( * ) — in this example, "Stephanie D" — and click "OK" when you are done. You may continue to add other aliases, at any time.
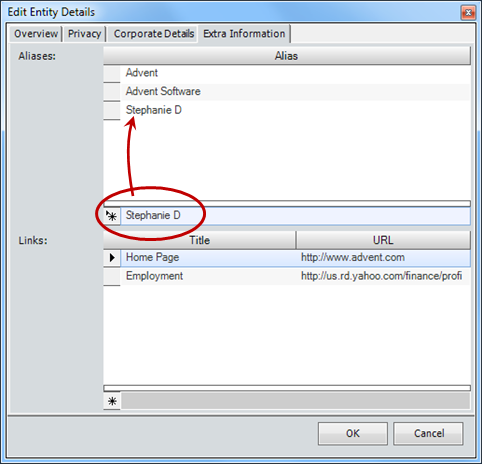
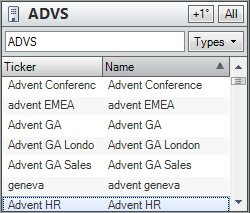
- Tamale will make the revision immediately, so that the next time you need to reference this ticker, you can type "Stephanie D" and all the entities containing "Stephanie D" in the entity name (or as aliases) will be listed in the Finder list. Double-click on the correct choice to view the research for that Entity.

EDIT / DELETE AN ALIAS
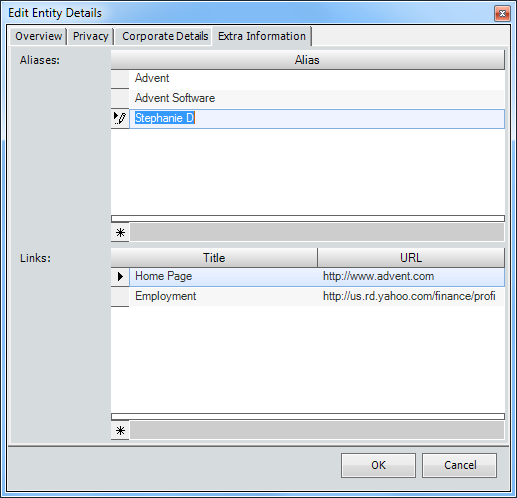
• In this example, you can edit "Stephanie D" to someone else's name if your contact has changed, or if you'd made a typographical error.
- Navigate to "ADVS" in the Finder, and right-click the name, then select "Edit Details" in the menu.
- Click on the "Extra Information" tab in the dialog, and in the upper half of this screen, click once to highlight the alias "Stephanie D" in the text field next to the right-facing arrow (
 ) — in this example, "Stephanie D" — and highlight the alias name. Edit as desired, and then click "OK" when you are done. You may continue to add other aliases, at any time. ) — in this example, "Stephanie D" — and highlight the alias name. Edit as desired, and then click "OK" when you are done. You may continue to add other aliases, at any time.
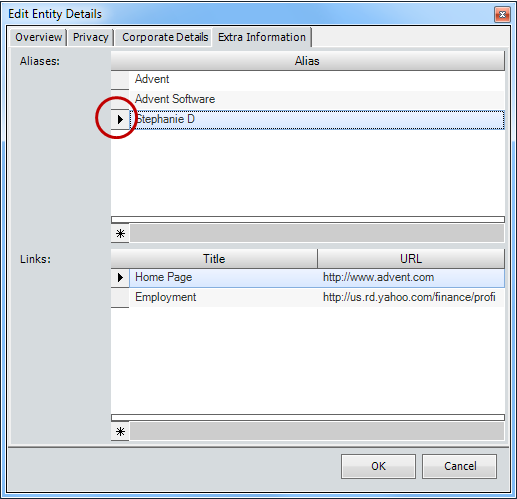
• To delete the alias
- Navigate to "ADVS" in the Finder, and right-click the name, then select "Edit Details" in the menu.
- In the Extra Information tab, in the topmost side of the dialog where the aliases are listed, locate the one you wish to delete, and click on the arrow next to it on the left. This will highlight the row.
- Use your keyboard DELETE key to remove the alias.
- Click OK at the bottom of the dialog when you are done. Click on the CANCEL button to retain the alias.
|
|